Credentials
To enable the monitoring we need to setup user account and appropriate access rights. While admin account would work fine we recommend to follow the least privilege principle and configure a separate user account for Opvizor/Cloud.
Using Web Interface
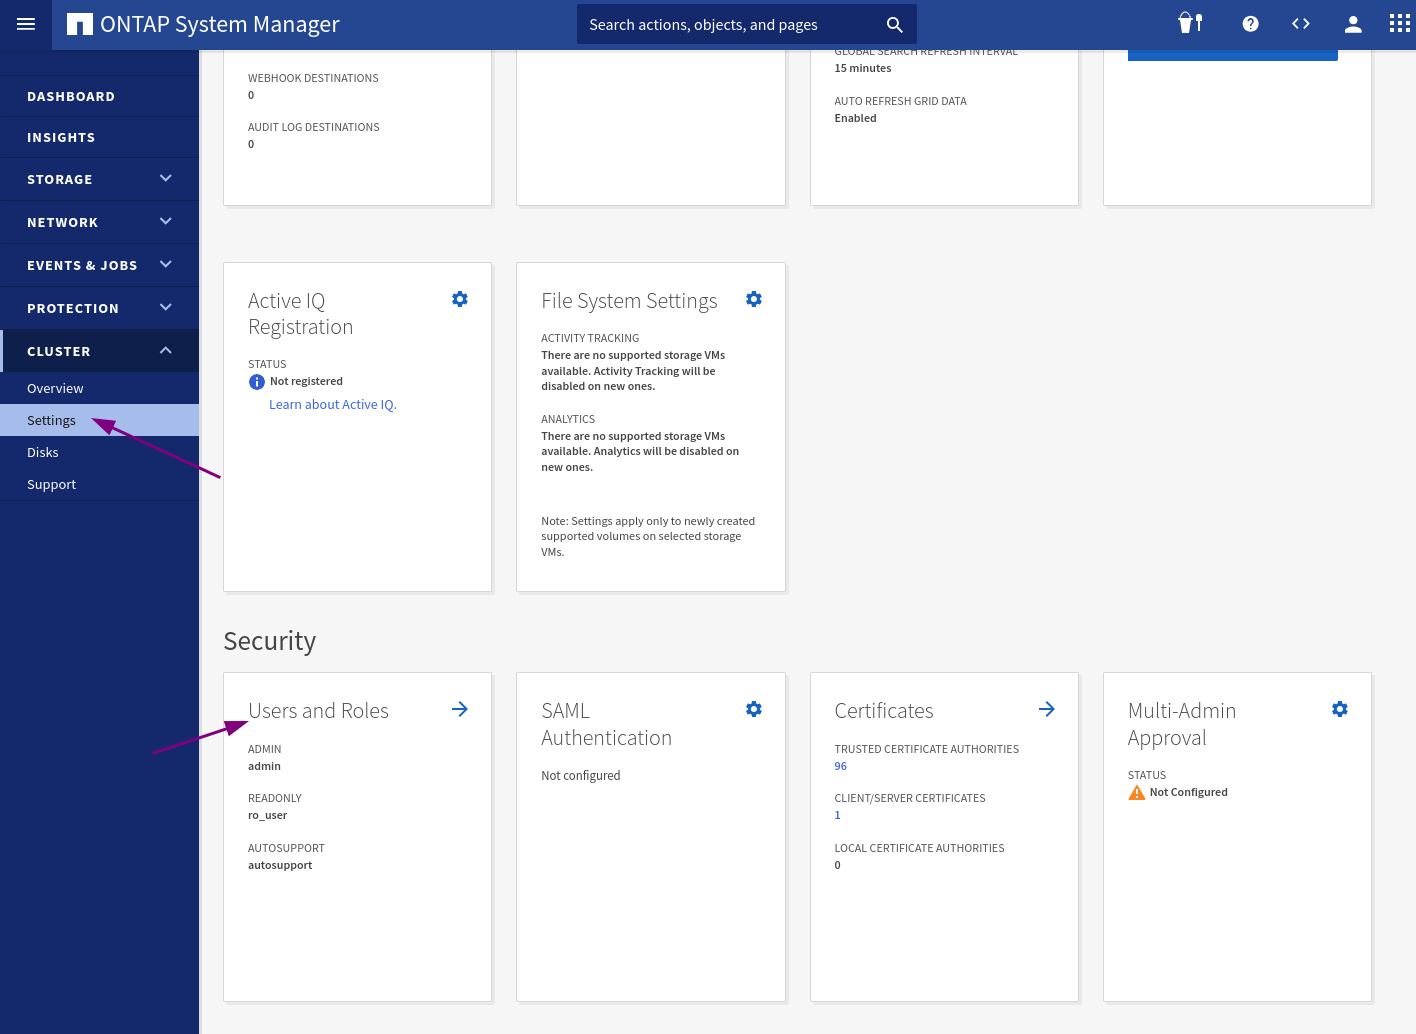
1. Go to your NetApp administration page and navigate to Users and Roles
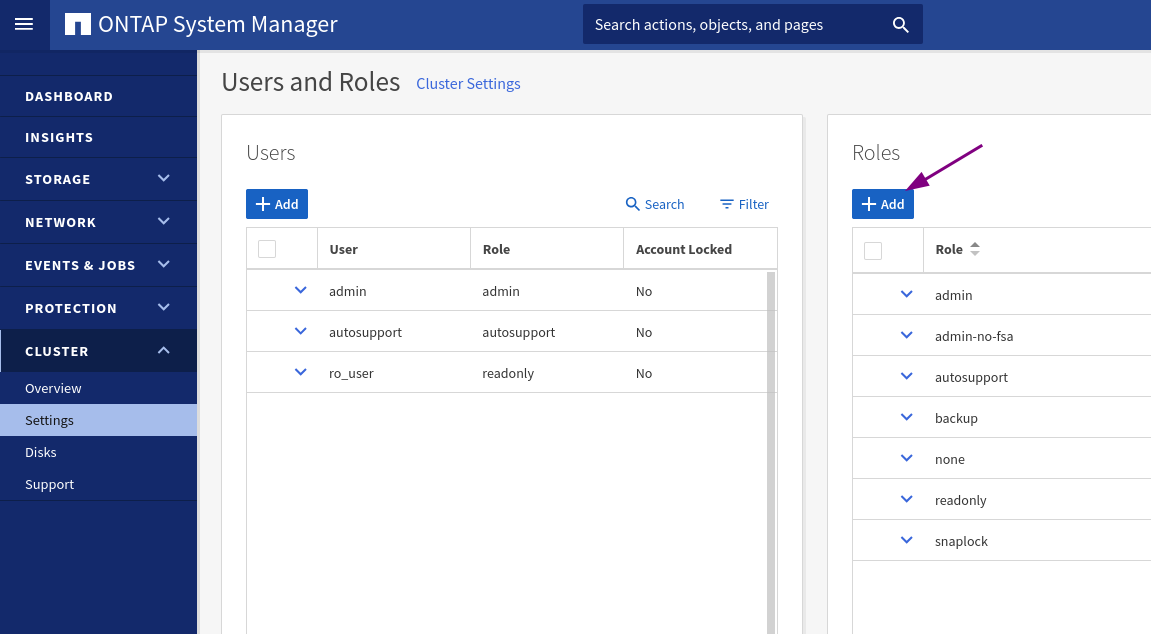
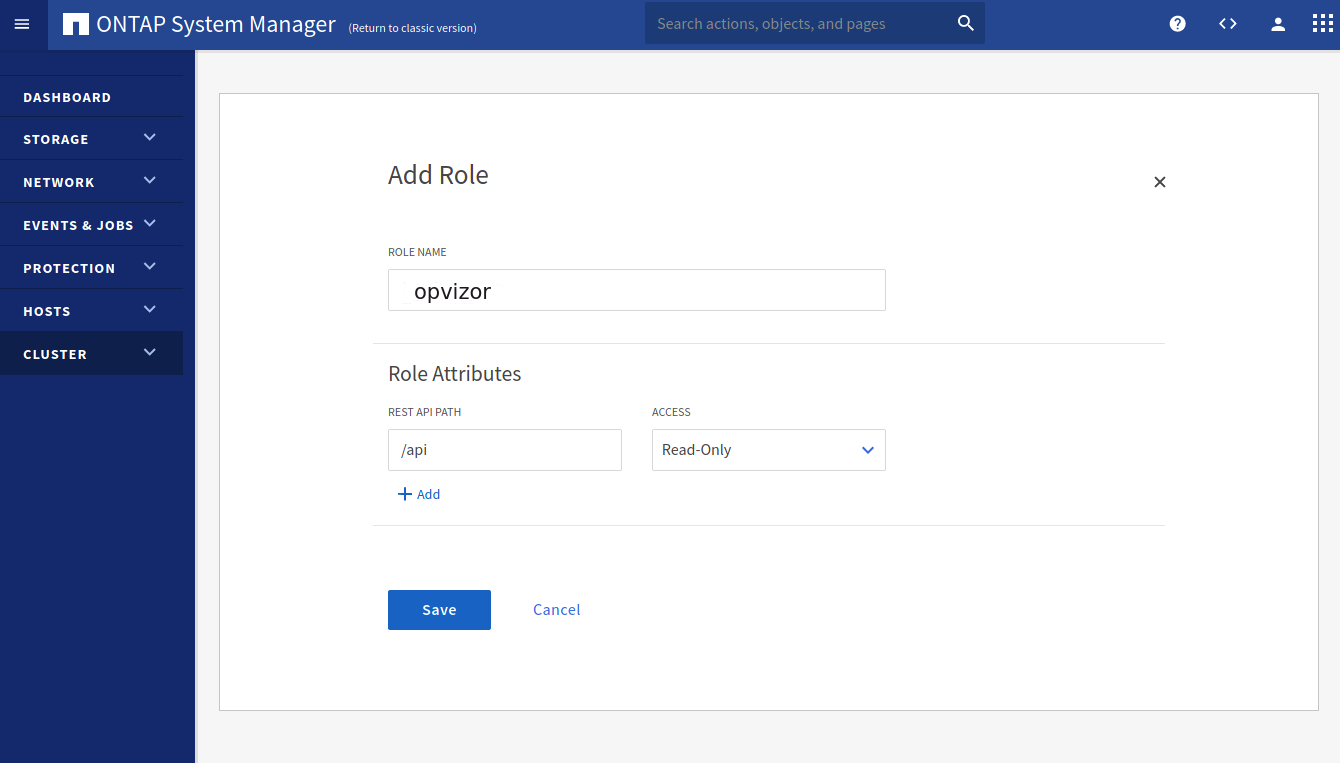
2. Create a new role
3. Add ReadOnly access to /api
4. Create user
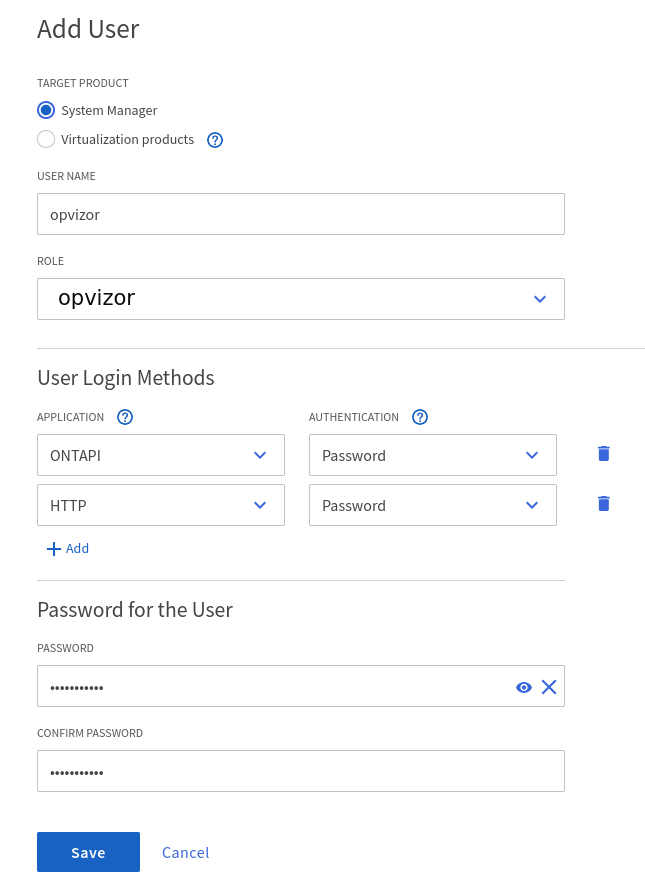
Finally create a new user account and attach the previously created role
Using SSH
1. Login to the NetApp appliance via SSH
2. Copy/Paste the following in your terminal to create a new role with read-only permissions to all objects in question
security login role create -role opvizor -access readonly -cmddirname "cluster"
security login role create -role opvizor -access readonly -cmddirname "lun"
security login role create -role opvizor -access readonly -cmddirname "network interface"
security login role create -role opvizor -access readonly -cmddirname "qos adaptive-policy-group"
security login role create -role opvizor -access readonly -cmddirname "qos policy-group"
security login role create -role opvizor -access readonly -cmddirname "qos workload show"
security login role create -role opvizor -access readonly -cmddirname "security"
security login role create -role opvizor -access readonly -cmddirname "snapmirror"
security login role create -role opvizor -access readonly -cmddirname "statistics"
security login role create -role opvizor -access readonly -cmddirname "storage aggregate"
security login role create -role opvizor -access readonly -cmddirname "storage disk"
security login role create -role opvizor -access readonly -cmddirname "storage encryption disk"
security login role create -role opvizor -access readonly -cmddirname "storage shelf"
security login role create -role opvizor -access readonly -cmddirname "system health status show"
security login role create -role opvizor -access readonly -cmddirname "system health subsystem show"
security login role create -role opvizor -access readonly -cmddirname "system node"
security login role create -role opvizor -access readonly -cmddirname "version"
security login role create -role opvizor -access readonly -cmddirname "volume"
security login role create -role opvizor -access readonly -cmddirname "vserver"
3. Finally create a new user account and assign the previously created role
security login create -user-or-group-name opvizor -application ontapi -role opvizor -authentication-method password
security login create -user-or-group-name opvizor -application http -role opvizor -authentication-method password
7-Mode CLI
Login to the instance using SSH and execute the following ti grant read-only access
useradmin role modify opvizor -a login-http-admin,api-system-get-version, \
api-system-get-info,api-perf-object-*,api-ems-autosupport-log,api-diagnosis-status-get, \
api-lun-list-info,api-diagnosis-subsystem-config-get-iter,api-disk-list-info, \
api-diagnosis-config-get-iter,api-aggr-list-info,api-volume-list-info, \
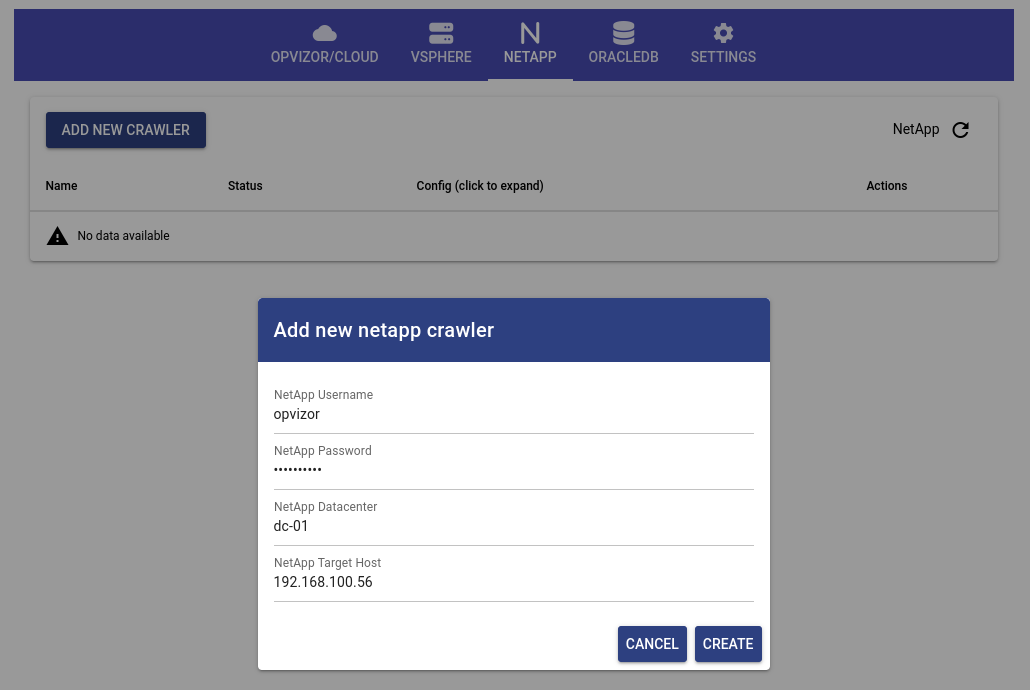
api-storage-shelf-environment-list-info,api-qtree-list,api-quota-reportFinalize the NetApp setup by configuring crawler in the Opvizor/Cloud Connector appliance